Introduction
Docker is a widely accepted and used tool by leading IT companies to build, manage and secure their applications.
Containers, like Docker, allow developers to isolate and run multiple applications on a single operating system, rather than dedicating a Virtual Machine for each application on the server. The use of these more lightweight containers leads to lower costs, better resource usage, and higher performance.
If you're interested in reading more, you should take a look at Docker: A High Level Introduction.
In this article, we'll write a simple Python web application using Flask and get it ready for "dockerizing", followed by creating a Docker Image, and deploying it both to a test and production environment.
Note: This tutorial assumes that you have Docker installed in your machine. If not, you can follow the official Docker Install Guide.
What is Docker?
Docker is a tool that enables developers to ship their applications (along with libraries and other dependencies), ensuring that they can run with the exact same configuration, regardless of the environment in which they're deployed.
This is done by isolating the applications in individual containers, which, although separated by containers, share the operating system and adequate libraries.
Docker can be broken down into:
- Docker Engine – A software packaging tool used to containerize applications.
- Docker Hub – A tool for managing your container applications in the cloud.
Why Containers?
It's important to understand the importance and usefulness of containers. Although they might not make much of a difference with a single application deployed to the server, or in home projects – containers can be a lifesaver when it comes to robust and resource-heavy applications, especially if they share the same server, or if they are deployed in many different environments.
This was firstly solved with Virtual Machines like VMWare and Hypervisors, though they've proven to not be optimal when it comes to efficiency, speed, and portability.
Docker Containers are lightweight alternatives to Virtual Machines – unlike VM's, we don't need to pre-allocate RAM, CPU, or other resources for them and we don't need to boot a new VM for each and every application since we're working with only one operating system.
Developers don't need to burden themselves with shipping special versions of software for different environments and can focus on creating the core business logic behind the app.
Project Setup
Flask is a Python micro-framework used to create both simple and advanced web applications. Due to its ease-of-use and setup, we'll be using it for our demo application.
If you don't have Flask already installed, it's easy to do so with a single command:
$ pip install flask
After Flask has been installed, create a project folder, named FlaskApp for an example. In this folder, create a base file, named something like app.py.
Within app.py import the Flask module and create a web app using the following:
from flask import Flask

app = Flask(__name__)`
Next, let's define the basic route / and the corresponding request handler:
@app.route("/")
def index():
  return """
  <h1>Python Flask in Docker!</h1>
  <p>A sample web-app for running Flask inside Docker.</p>
  """
Finally, let's launch the app if the script is invoked as the main program:
if __name__ == "__main__":
    app.run(debug=True, host='0.0.0.0')
$ python3 app.py
Navigate your browser to http://localhost:5000/. You should be prompted with the "Dockerizing Python app using Flask" message!

Dockerizing the Application
To run an application with Docker, we have to build a container with all of the dependencies used in it - which in our case is only Flask. To do this, we'll include a requirements.txt file containing the required dependencies and create a Dockerfile that relies on the file to build an image.
Also, when we launch the container, we'll have to have access to the HTTP ports on which the app is running.
Preparing the Application
Including dependencies in the requirements.txt file is very easy. We simply need to include the name and the version of the dependency:
Flask==1.0.2
Next, we need to ensure that all the Python files necessary for our application to run are inside a top-level folder, for example, called app.
It's also advised for the main entry-point to be named app.py as it's good practice to name the Flask object created in the script as app to make deployment easier.
docker-flask-tutorial
    ├── requirements.txt
    ├── Dockerfile
    └── app
        └── app.py
        └── <other .py files>
Creating a Dockerfile
A Dockerfile is essentially a text file with clearly defined instructions on how to build a Docker image for our project.
Next we'll create a Docker image based on Ubuntu 16.04 and Python 3.X:
FROM ubuntu:16.04

MAINTAINER Madhuri Koushik "[email protected]"

RUN apt-get update -y && \
    apt-get install -y python3-pip python3-dev

COPY ./requirements.txt /requirements.txt

WORKDIR /

RUN pip3 install -r requirements.txt

COPY . /

ENTRYPOINT [ "python3" ]

CMD [ "app/app.py" ]
There are a few commands here which deserve a proper explanation:
- FROM - Every Dockerfile starts with a
FROMkeyword. It's used to specify the base image from which the image is built. The following line provides metadata about the maintainer of the image. - RUN - We can add additional content to the image by running installation tasks and storing the results of these commands. Here, we simply update the package information, install
python3andpip. We usepipin the secondRUNcommand to install all packages in therequirements.txtfile. - COPY - The
COPYcommand is used to copy files/directories from the host machine to the container during the build process. In this case, we are copying the application files includingrequirements.txt. - WORKDIR - sets the working directory in the container which is used by RUN, COPY, etc...
- ENTRYPOINT - Defines the entry point of the application
- CMD - Runs the
app.pyfile in theappdirectory.
How Docker Images are Built
Docker images are built using the docker build command. When building an image, Docker creates so-called "layers". Each layer records the changes resulting from a command in the Dockerfile and the state of the image after running the command.
Docker internally caches these layers so that when re-building images it needs to re-create only those layers that have changed. For example, once it loads the base image for ubuntu:16.04, all subsequent builds of the same container can re-use this since this will not change. However, during every rebuild, the contents of the app directory will likely be different and thus this layer will be rebuilt every time.
Whenever any layer is re-built all the layers that follow it in the Dockerfile need to be rebuilt too. It's important to keep this fact in mind while creating Dockerfiles. For example, we COPY the requirements.txt file first and install dependencies before COPYing the rest of the app. This results in a Docker layer containing all the dependencies. This layer need not be re-built even if other files in the app change as long as there are no new dependencies.
Thus we optimize the build process for our container by separating the pip install from the deployment of the rest of our app.
Building the Docker Image
Now that our Dockerfile is ready and we understand how the build process works, let's go ahead and create the Docker image for our app:
$ docker build -t docker-flask:latest .
Running Application in Debug Mode with Auto-Restart
Due to the advantages of containerization described earlier, it makes sense to develop applications that will be deployed in containers within the container itself. This ensures that from the beginning, the environment in which the app is built is clean and thus eliminates surprises during delivery.
However, while developing an app it's important to have quick re-build and test cycles to check each intermediate step during development. For this purpose, web-app developers depend on auto-restart facilities provided by frameworks like Flask. It's possible to leverage this from within the container as well.
Check out our hands-on, practical guide to learning Git, with best-practices, industry-accepted standards, and included cheat sheet. Stop Googling Git commands and actually learn it!
To enable auto-restart, we start the Docker container mapping our development directory to the app directory within the container. This means Flask will watch the files in the host (through this mapping) for any changes and restart the application automatically when it detects any changes.
Additionally, we also need to forward the application ports from the container to the host. This is to enable a browser running on the host to access the application.
To achieve this, we start the Docker container with volume-mapping and port-forwarding options:
$ docker run --name flaskapp -v$PWD/app:/app -p5000:5000 docker-flask:latest
This does the following:
- Starts a container based on the
docker-flaskimage we built previously. - This container's name is set to
flaskapp. Without the--nameoption, Docker chooses an arbitrary (and a very interesting) name for the container. Specifying a name explicitly will help us in locating the container (for stopping etc.,.) - The
-voption mounts the app folder on the host to the container. - The
-poption maps the port on the container to the host.
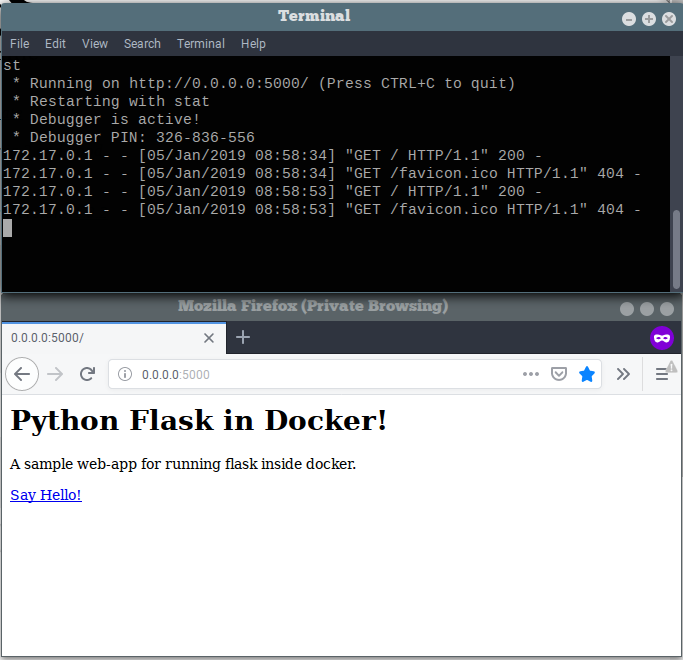
Now the application can be accessed at http://localhost:5000 or http://0.0.0.0:5000/:
If we make changes to the application when the container is running and save the file, Flask detects the changes and restarts the app:

To stop the container, press Ctrl-C and remove the container by running docker rm flaskapp.
Running the Application in Production Mode
While running the app with Flask directly is good enough for development, we need to use a more robust deployment method for production.
Normally, a Flask web-app in production may need to handle multiple parallel connections and thus is usually deployed over a WSGI-compliant web-server.
A popular alternative is Nginx + uWSGI and in this section we will see how to set up our web-app for production. Nginx is an open-source web-server and uWSGI is a "fast, self-healing application container server".
First, we create a facade which will start our application in either development or production mode and depending on the mode it will choose to run nginx or Python directly.
We will call this file launch.sh and it will be a simple shell script. This file is based on entry-point.sh:
#!/bin/bash

if [ ! -f /debug0 ]; then
  touch /debug0

  while getopts 'hd:' flag; do
    case "${flag}" in
      h)
        echo "options:"
        echo "-h        show brief help"
        echo "-d        debug mode, no nginx or uwsgi, direct start with 'python3 app/app.py'"
        exit 0
        ;;
      d)
        touch /debug1
        ;;
      *)
        break
        ;;
    esac
  done
fi

if [ -e /debug1 ]; then
  echo "Running app in debug mode!"
  python3 app/app.py
else
  echo "Running app in production mode!"
  nginx && uwsgi --ini /app.ini
fi
Next, we create an uWSGI configuration file for our app and an nginx configuration.
Essentially, this file describes our application entry-point to uWSGI/nginx:
[uwsgi]
plugins = /usr/lib/uwsgi/plugins/python3
chdir = /app
module = app:app
uid = nginx
gid = nginx
socket = /run/uwsgiApp.sock
pidfile = /run/.pid
processes = 4
threads = 2
Finally, we modify our Dockerfile to include nginx and uWSGI. Apart from installing nginx, uWSGI, and the uWSGI Python3 plugin, it now also copies the nginx.conf to the appropriate location and sets up user permissions required to run nginx.
Also the Dockerfile ENTRYPOINT is set to the shell script which helps us to run the container in debug or production mode:
FROM ubuntu:16.04

MAINTAINER Madhuri Koushik "[email protected]"

RUN apt-get update -y && \
    apt-get install -y python3-pip python3-dev && \
    apt-get install -y nginx uwsgi uwsgi-plugin-python3

COPY ./requirements.txt /requirements.txt
COPY ./nginx.conf /etc/nginx/nginx.conf

WORKDIR /

RUN pip3 install -r requirements.txt

COPY . /

RUN adduser --disabled-password --gecos '' nginx\
  && chown -R nginx:nginx /app \
  && chmod 777 /run/ -R \
  && chmod 777 /root/ -R

ENTRYPOINT [ "/bin/bash", "/launcher.sh"]
Now, we can rebuild the image:
$ docker build -t docker-flask:latest .
And run the app using nginx:
$ docker run -d --name flaskapp --restart=always -p 80:80 docker-flask:latest
This image is self-contained and needs only the port mapping to be specified during deployment. This will start and run the command in the background. To stop and remove this container, run the following command:
$ docker stop flaskapp && docker rm flaskapp
Also, if we need to debug or add features, we can easily run the container in debug mode mounting our own version of the source tree:
$ docker run -it --name flaskapp -p 5000:5000 -v$PWD/app:/app docker-flask:latest -d
Managing External Dependencies
When shipping apps as containers, a key item to be remembered is that the responsibilities of the developer towards managing dependencies is increased. In addition to identifying and specifying the right dependencies and versions, they are also responsible for the installation and setup of these dependencies in the container environment.
Luckily, requirements.txt is an easy mechanism for specifying dependencies. Any package that is available via pip can be added to it.
But again, anytime the requirements.txt file is modified, the Docker image needs to be rebuilt.
Installing Dependencies at Startup
Occasionally, it may be required to install additional dependencies at startup-time. Say, you are trying out a new package during development and don't want to re-build the Docker image every time or you want to use the latest available version at the time of launch. It's possible to achieve this by modifying the launcher to run pip at the start of application launch.
We can similarly install additional OS-level package dependencies as well. Let's modify the launcher.sh:
#!/bin/bash

if [ ! -f /debug0 ]; then
    touch /debug0

    if [ -e requirements_os.txt ]; then
        apt-get install -y $(cat requirements_os.txt)
    fi
    if [ -e requirements.txt ]; then
        pip3 install -r requirements.txt
    fi

    while getopts 'hd' flag; do
        case "${flag}" in
            h)
                echo "options:"
                echo "-h        show brief help"
                echo "-d        debug mode, no nginx or uwsgi, direct start with 'python3 app/app.py'"
                exit 0
                ;;
            d)
                echo "Debug!"
                touch /debug1
                ;;
        esac
    done
fi

if [ -e /debug1 ]; then
    echo "Running app in debug mode!"
    python3 app/app.py
else
    echo "Running app in production mode!"
    nginx && uwsgi --ini /app.ini
fi
Now, in the requirements_os.txt, we can specify a list of space-separated package names in one-line and these along with the packages in requirements.txt will be installed before the app is launched.
Although this is provided as a convenience during development, it's not good practice to install dependencies during startup-time for several reasons:
- It defeats one of the goals of containerization which is to fix and test against dependencies that do not change due to change of deployment environment.
- It adds additional overhead at the start of the application which will increase startup-time for the container.
- Pulling dependencies every time the application is started is a poor use of network resources.
Conclusion
In this article, we dove into Docker, a widely-used containerization tool. We created a simple web application with Flask, a custom Docker image based on Ubuntu for running our web application in development and production mode.
Finally, we set up the deployment for our web application using nginx and uWSGI within the Docker container and explored methods for installing external dependencies.
Containerization is a powerful technology that enables rapid development and deployment of apps in the cloud and we hope you can apply what you learned here in your own apps.

