
Introduction
Time is precious and delegating time and resources to perform menial tasks tends to waste resources and money. Hence, organizations strive to achieve full-scale automation in their systems since it's much more scalable and significantly cheaper.
As the complexity of the business processes increases, so does the benefit of automation in the system.
Automation is where the concepts of Jobs or Schedulers are prevalent. Job scheduling is often referred to as any kind of batch of processes (jobs), executed at a given time. Since most of these jobs do not demand immediate execution, they can be scheduled to be processed in the near future or at repetitive intervals.
In general, automating any kind of process over a manual approach leads to:
- Resource Efficiency
- Fewer errors
- More scalability
One of the most powerful and elastic scheduling frameworks used for large-scale Java applications is known as Quartz.
In this guide, we'll be implementing Quartz and its components into a Spring Boot application, building our own Quartz Management Console for custom Jobs and Triggers.
Note: A runnable, fully-fledged copy of the Quartz Management Console we'll be building is available on our GitHub.
The Quartz Job Scheduler
Quartz is an open-source, heavily featured job-scheduling framework written in Java and has been designed to integrate with any kind of J2EE or J2SE framework. It offers huge flexibility without sacrificing complexity or scalability.
The name, presumably, comes from the Quartz crystal used in extremely precise watches and clocks, that under electric oscillation, moves the watch hands in a regular time frame.
If an application is expected to perform tasks at scheduled intervals or due to some events, Quartz is a great fit:
- Trigger Email reminders or alerts: You can easily trigger password expiry mails or other kinds of reminder alerts to different users based on account activity.
- Perform File-transfer or Messaging operations: Jobs can be easily scheduled at certain intervals to publish/consume messages/data/files from various brokers or FTP sites.
- Auto-generate reports: Companies often prefer to generate nightly/weekly reports to showcase business performance. These jobs can easily generate reports and trigger emails to employees at a scheduled time.
- Driving The Task Workflow: Large e-Commerce organizations can schedule a job to fire exactly at certain intervals to pick an order from a channel and process it for fulfillment or manifestation.
Some of the salient features of Quartz are:
- It can be instantiated within an application server or servlet container and can participate in XA transactions.
- It can be hosted as a cluster of stand-alone programs (with load-balancing and fail-over capabilities) for the execution of jobs.
- Jobs are scheduled to run when a trigger occurs, such as a certain time of day, certain days of weeks, months or years, skipping execution on holidays, repeating until a date or indefinitely, etc.
- Jobs can be persisted either in memory or in any JDBC datastore.
- It can participate in JTA transactions.
Key Components of Quartz Scheduler Model
To improve scalability, Quartz runs on a multi-threaded environment. This helps the framework to run jobs concurrently.
The heart of the overall framework is the
Schedulerinterface. TheSchedulerkeeps track of all theJobDetails andTriggers for them. They represent what needs to be run (whichJob) and when (whatTriggers that job).
Thus, they form the main components of the framework. The rest of all the other components make sure that it happens with due diligence and effectively.
Let's take an eagle's eye view of the key components we'll be using:
- Scheduler Factory – The factory bean that is responsible for building the
Schedulermodel and wiring in all the dependent components, based on the contents of the quartz properties file. - Scheduler – Maintains the JobDetail/Trigger registry. It is also responsible for executing the associated jobs when a trigger fires.
- Scheduler Thread – The thread responsible for performing the work of firing the triggers. It contacts the
JobStoreto get the next set of triggers to be fired. - Job – An interface that must be implemented by the task to be executed.
- Trigger – Instructs the scheduler about the time that the associated job should be fired.
- JobStore – An interface to be implemented by the classes that provide a storage mechanism for Jobs and Triggers.
- ThreadPool – A job to be executed is transferred to the pool of threads, represented by the
ThreadPool. - Worker Threads - Individual threads that build up the
ThreadPooland execute jobs.

Building a Quartz Management Console
We'll be building our own Quartz Management Console, to gain an understanding and appreciation of the life-cycles within a Quartz Scheduler.
To that end, we'll build a simple UI driven management console that can perform two kinds of tasks:
- Schedule and Manage Simple Job
- Schedule and Manage a Cron Job
It would look something like this after implementation:

Project Setup
Let's create a Spring Boot project and implement each Quartz component one-by-one. The easiest way to start with a skeleton project is via Spring Initializr:

We have added Spring Web for MVC functionalities, Spring Data JPA to store data into a datastore, H2 as an in-memory database, Lombok (optional boilerplate-reducing library) and Thymeleaf (Templating engine for Spring/MVC applications). We've also included the spring-boot-starter-quartz package to get Quartz into our project.
Database Connection and Initialization
Quartz brings in its own built-in JobStores. In Spring Boot, we can choose between:
- In-Memory JobStores: Keep all the data in RAM, so that when the application stops or crashes, all data is dumped and all the scheduling information is lost. For this, we use a
RAMJobStore. - JDBC JobStores: Persist all the data in the datastore so that the data is not lost. Configuration is a bit more involved than in-memory (RAM) job stores.
Note: You can choose these JobStore types regardless of your database.
We'll be using H2 as our datastore, and setting up Quartz to persist the data.
Quartz requires you to initialize the database tables for JDBC JobStores, as they're not created automatically. To that end, we'll use an SQL script to run when initializing the database.
You can find the initialization script on our GitHub.
Let's start the development of our management application by defining the database connection parameters for H2. In your application.properties file, let's define the init.schema (initial setup script), as well as the datasource parameters:
server.port=8080

spring.sql.init.schema-locations=classpath:db/quartz_tables_h2.sql
spring.h2.console.enabled=true
spring.datasource.url=jdbc:h2:mem:testdb
spring.datasource.username=sa
spring.datasource.password=

logging.level.org.hibernate.SQL=debug
The quartz_tables_h2.sql script consists of a lengthy set of SQL commands used to set it up initially:
-- Note, Quartz depends on row-level locking which means you must use the MVC=TRUE
-- setting on your H2 database, or you will experience dead-locks
--
-- In your Quartz properties file, you'll need to set
-- org.quartz.jobStore.driverDelegateClass = org.quartz.impl.jdbcjobstore.StdJDBCDelegate

CREATE TABLE QRTZ_CALENDARS (
  SCHED_NAME VARCHAR(120) NOT NULL,
  CALENDAR_NAME VARCHAR (200)  NOT NULL ,
  CALENDAR IMAGE NOT NULL
);

...
-- Download the entire script from our GitHub repository
...

COMMIT;
Quartz Properties
Once the database connection can be established and we've got our initialization script ready - we'll want to set up the Quartz Scheduler and its components.
Most aspects and components are customizable, to a degree, such as which drivers JobStores should use, how many threads there are in the ThreadPool and which priority they have, etc.
All of these are defined in a quartz.properties file, which should be located under /src/resources/. This is the directory in which the QuartzProperties class looks for the required properties by default.
Note: If you want to define it in another property file, you'll have to point the org.quartz.properties system property to that file.
Let's define some of the properties now:
#============================================================================
# Configure Main Scheduler Properties
#============================================================================
org.quartz.scheduler.instanceName=spring-boot-quartz
org.quartz.scheduler.instanceId=AUTO

#============================================================================
# Configure ThreadPool
#============================================================================
org.quartz.threadPool.class = org.quartz.simpl.SimpleThreadPool
org.quartz.threadPool.threadCount = 25
org.quartz.threadPool.threadPriority = 5

#============================================================================
# Configure JobStore
#============================================================================
org.quartz.jobStore.misfireThreshold=1000
org.quartz.jobStore.class=org.quartz.impl.jdbcjobstore.JobStoreTX
org.quartz.jobStore.driverDelegateClass=org.quartz.impl.jdbcjobstore.StdJDBCDelegate
org.quartz.jobStore.useProperties=true
org.quartz.jobStore.tablePrefix=QRTZ_


#============================================================================
# Configure Cluster properties
#============================================================================
org.quartz.jobStore.isClustered=true
org.quartz.jobStore.clusterCheckinInterval=1000
Defining a Scheduler Job Factory Bean
All of these properties don't mean much if we don't use them in a @Configuration class to customize how Quartz works. Let's inject the properties from quartz.properties into a SchedulerConfig class, where we'll initialize the SchedulerJobFactoryBean class, passing the properties in.
We'll be implementing our own SchedulerJobFactoryBean as a SpringBeanJobFactory from the Quartz project:
@Configuration
public class SchedulerConfig {

    @Autowired
    private DataSource dataSource;

    @Autowired
    private ApplicationContext applicationContext;

    @Autowired
    private QuartzProperties quartzProperties;

    @Bean
    public SchedulerFactoryBean schedulerFactoryBean() {

        SchedulerJobFactory jobFactory = new SchedulerJobFactory();
        jobFactory.setApplicationContext(applicationContext);

        Properties properties = new Properties();
        properties.putAll(quartzProperties.getProperties());

        SchedulerFactoryBean factory = new SchedulerFactoryBean();
        factory.setOverwriteExistingJobs(true);
        factory.setDataSource(dataSource);
        factory.setQuartzProperties(properties);
        factory.setJobFactory(jobFactory);
        return factory;
    }
}
The QuartzProperties class contains the properties defined in the quartz.properties file. We can retrieve them via getProperties() and add them to the SchedulerFactoryBean, alongside the DataSource, and SchedulerJobFactory.
The SchedulerJobFactory is our custom implementation of the SpringBeanJobFactory that Quartz provides us with. Let's extend it:
public class SchedulerJobFactory extends SpringBeanJobFactory implements ApplicationContextAware {

    private AutowireCapableBeanFactory beanFactory;

    @Override
    public void setApplicationContext(final ApplicationContext context) {
        beanFactory = context.getAutowireCapableBeanFactory();
    }

    @Override
    protected Object createJobInstance(final TriggerFiredBundle bundle) throws Exception {
        final Object job = super.createJobInstance(bundle);
        beanFactory.autowireBean(job);
        return job;
    }
}
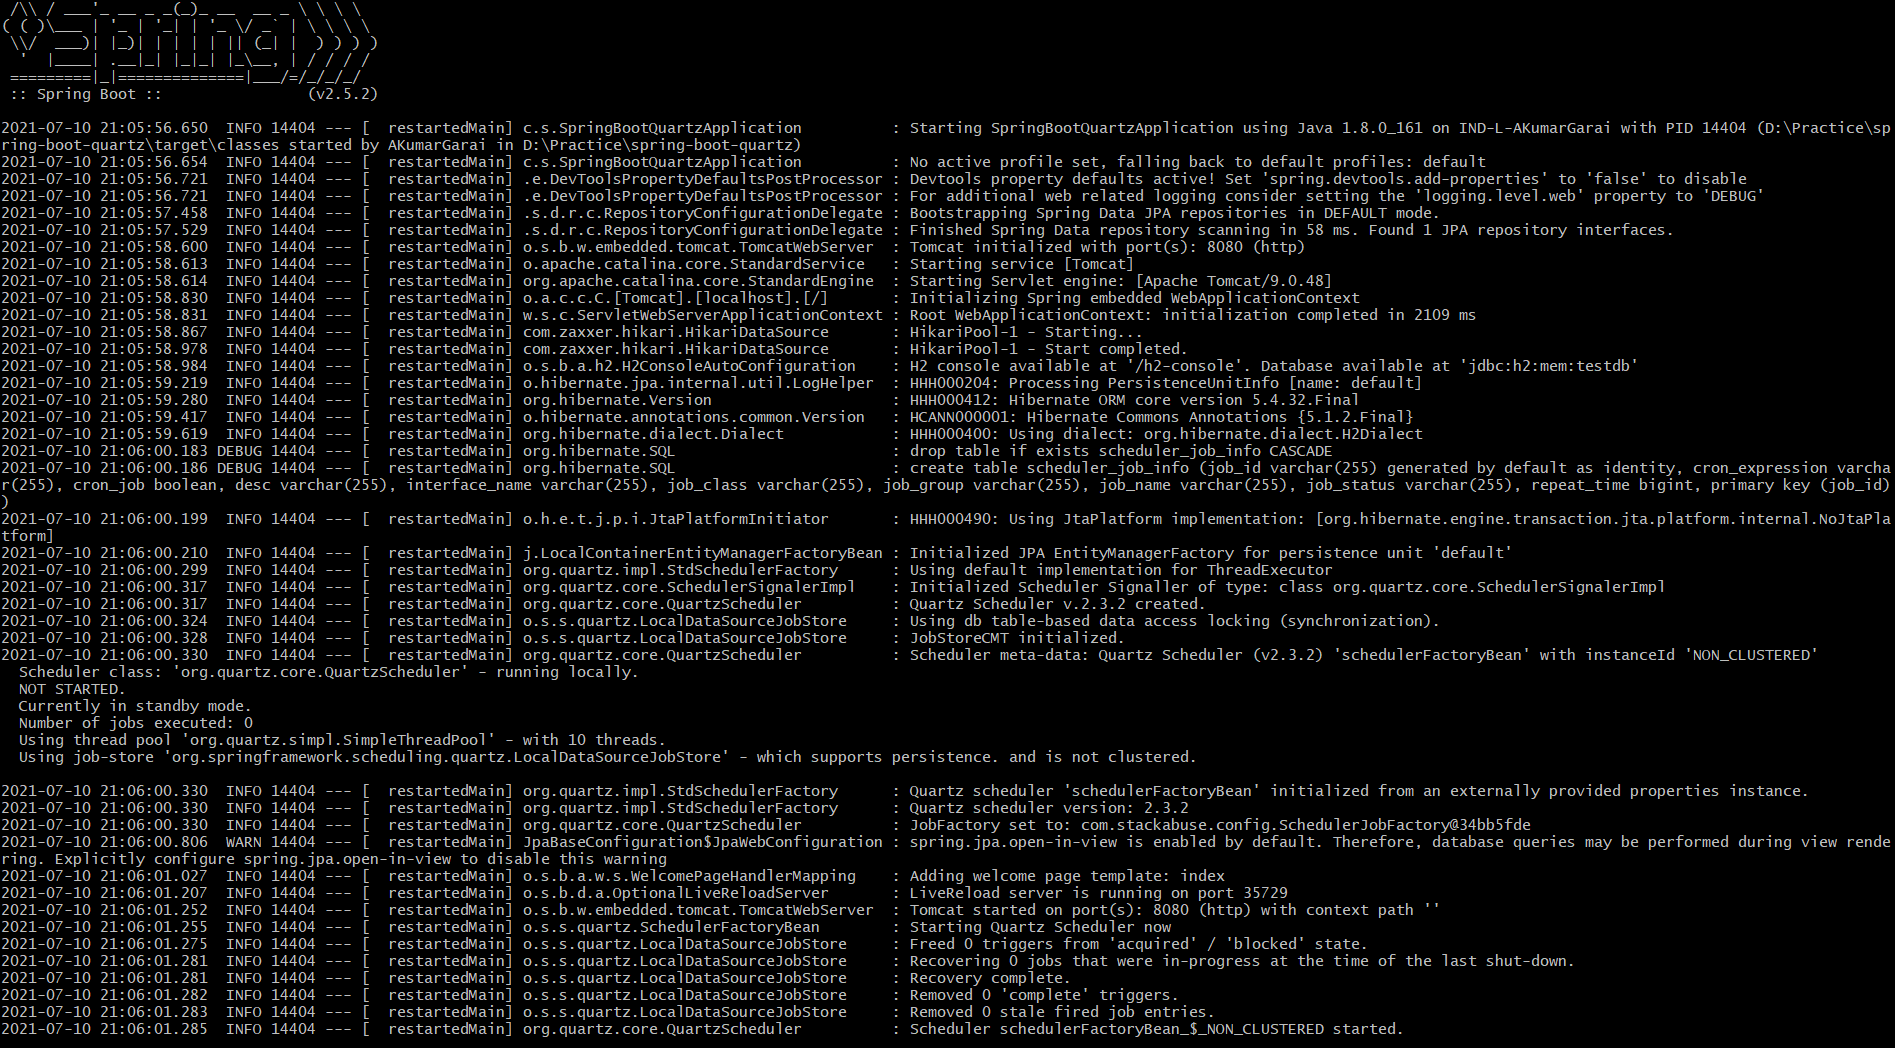
Now, we can create jobs through our factory, and autowire it when required. At this stage - we can bring up a running Quartz scheduler instance. If we run our application, we'll be greeted with something along the lines of:
Defining a Generic Job Scheduler Creator
There are two types of triggers in Quartz - CronTrigger and SimpleTrigger. These correspond to the CronScheduler and SimpleScheduler respectively, and we can create the triggers using their respective factories.
A CronTrigger triggers based on a cron expression while a SimpleTrigger triggers on an interval.
To create job triggers, let's define a couple of convenience methods that instantiate and return them via their respective factories. These methods will be situated in a JobSchedulerCreator - a @Component that we'll be using to create jobs and triggers:
Check out our hands-on, practical guide to learning Git, with best-practices, industry-accepted standards, and included cheat sheet. Stop Googling Git commands and actually learn it!
@Component
public class JobScheduleCreator {
    // Creation methods
}
Let's start off with a CronTrigger creator method:
public CronTrigger createCronTrigger(String triggerName, Date startTime, String cronExpression, int misFireInstruction) {
    CronTriggerFactoryBean factoryBean = new CronTriggerFactoryBean();
    factoryBean.setName(triggerName);
    factoryBean.setStartTime(startTime);
    factoryBean.setCronExpression(cronExpression);
    factoryBean.setMisfireInstruction(misFireInstruction);
    try {
      factoryBean.afterPropertiesSet();
    } catch (ParseException e) {
      log.error(e.getMessage(), e);
    }
    return factoryBean.getObject();
}
Using the CronTriggerFactoryBean, we pass in the required information about a Trigger, such as its name, starting time as well as the cron expression and misfire instruction. Once generated - the object is returned.
Much the same process is applied to create SimpleTrigger objects:
public SimpleTrigger createSimpleTrigger(String triggerName, Date startTime, Long repeatTime, int misFireInstruction) {
    SimpleTriggerFactoryBean factoryBean = new SimpleTriggerFactoryBean();
    factoryBean.setName(triggerName);
    factoryBean.setStartTime(startTime);
    factoryBean.setRepeatInterval(repeatTime);
    factoryBean.setRepeatCount(SimpleTrigger.REPEAT_INDEFINITELY);
    factoryBean.setMisfireInstruction(misFireInstruction);
    factoryBean.afterPropertiesSet();
    return factoryBean.getObject();
}
With a straightforward way to build triggers, we can also build a convenience method to build jobs - relying on the JobDetailFactoryBean:
public JobDetail createJob(Class<? extends QuartzJobBean> jobClass, boolean isDurable,
                           ApplicationContext context, String jobName, String jobGroup) {
    JobDetailFactoryBean factoryBean = new JobDetailFactoryBean();
    factoryBean.setJobClass(jobClass);
    factoryBean.setDurability(isDurable);
    factoryBean.setApplicationContext(context);
    factoryBean.setName(jobName);
    factoryBean.setGroup(jobGroup);

    // Set job data map
    JobDataMap jobDataMap = new JobDataMap();
    jobDataMap.put(jobName + jobGroup, jobClass.getName());
    factoryBean.setJobDataMap(jobDataMap);
    factoryBean.afterPropertiesSet();
    return factoryBean.getObject();
}
Defining a Scheduler Job Info Entity
To keep track of job details and information - we can use the JobDetails class. That's what it's meant for. However, we can benefit from defining a proxy for that class of our own.
It's not advisable to write to Quartz tables directly ourselves, so the jobs and their details, although persisted, are fixed. We can define a new entity to keep track of these jobs in a separate table, and do with them as we wish - and also use these objects as Data Transfer Objects (DTOs) at the same time.
This allows us to perform validation of incoming data and allows us to have more granular control over how the jobs are persisted in the database.
Although optional, it's advised to use a proxy like this - we'll name it SchedulerJobInfo:
// Lombok annotations for getters, setters and constructor
public class SchedulerJobInfo {

    @Id
    @GeneratedValue(strategy = GenerationType.IDENTITY)
    private String jobId;
    private String jobName;
    private String jobGroup;
    private String jobStatus;
    private String jobClass;
    private String cronExpression;
    private String desc;
    private String interfaceName;
    private Long repeatTime;
    private Boolean cronJob;
}
For simple CRUD functionality - we'll create a simple JpaRepository for this entity:
@Repository
public interface SchedulerRepository extends JpaRepository<SchedulerJobInfo, Long> {
    SchedulerJobInfo findByJobName(String jobName);
}
Implementing Jobs in Quartz - Job and QuartzJobBean
Each job has to either extend the QuartzJobBean class or implement the Job interface.
QuartzJobBeanimplementsJoband the only difference is thatQuartzJobBeanapplies the passedJobDataMapand theSchedulerContextas bean property values, whereasJobdoesn't.
Additionally, Job requires you to implement the execute() method while QuartzJobBean requires you to implement the executeInternal() method.
Let's create a SimpleJob, that extends QuartzJobBean and prints integers from 0 to 5:
public class SimpleJob extends QuartzJobBean {
    @Override
    protected void executeInternal(JobExecutionContext context) throws JobExecutionException {
        log.info("SimpleJob Start................");
        IntStream.range(0, 5).forEach(i -> {
            log.info("Counting - {}", i);
            try {
                Thread.sleep(1000);
            } catch (InterruptedException e) {
                log.error(e.getMessage(), e);
            }
        });
        log.info("SimpleJob End................");
    }
}
Similarly, we can create a SimpleCronJob that fires on a specific cron expression:
@DisallowConcurrentExecution
public class SimpleCronJob extends QuartzJobBean {
    @Override
    protected void executeInternal(JobExecutionContext context) throws JobExecutionException {
        log.info("SimpleCronJob Start................");
        IntStream.range(0, 10).forEach(i -> {
            log.info("Counting - {}", i);
            try {
                Thread.sleep(1000);
            } catch (InterruptedException e) {
                log.error(e.getMessage(), e);
            }
        });
        log.info("SimpleCronJob End................");
    }
}
Note: We are applying @DisallowConcurrentExecution so that this job will not be executed by multiple schedulers concurrently in a clustered setup.
Defining Custom Utilities for Actions
In the Quartz Management Console, we'll have a few options for jobs:
- Create
- Edit
- Run Once
- Pause
- Resume
- Delete
These allow us to create, edit, pause, resume, delete and run a job once. To facilitate this - we'll write methods for each task, allowing us to control the jobs from a really simple and intuitive UI.
To tie this all together, we'll make a new class - the SchedulerJobService to perform these actions:
@Transactional
@Service
public class SchedulerJobService {

    @Autowired
    private Scheduler scheduler;

    @Autowired
    private SchedulerFactoryBean schedulerFactoryBean;

    @Autowired
    private SchedulerRepository schedulerRepository;

    @Autowired
    private ApplicationContext context;

    @Autowired
    private JobScheduleCreator scheduleCreator;

    // Create, edit, pause jobs, etc...
Create a Quartz Job
To create jobs, a proprietary saveOrUpdate() method determines whether the instance created via a specific SchedulerJobInfo DTO is to be saved into an existing entity or if a new job should be created. Based on the parameters in the payload, we'll either create a SimpleCronJob or SimpleJob:
public void saveOrUpdate(SchedulerJobInfo scheduleJob) throws Exception {
    if (scheduleJob.getCronExpression().length() > 0) {
        scheduleJob.setJobClass(SimpleCronJob.class.getName());
        scheduleJob.setCronJob(true);
    } else {
        scheduleJob.setJobClass(SimpleJob.class.getName());
        scheduleJob.setCronJob(false);
        scheduleJob.setRepeatTime((long) 1);
    }
    if (StringUtils.isEmpty(scheduleJob.getJobId())) {
        log.info("Job Info: {}", scheduleJob);
        scheduleNewJob(scheduleJob);
    } else {
        updateScheduleJob(scheduleJob);
    }
    scheduleJob.setDesc("i am job number " + scheduleJob.getJobId());
    scheduleJob.setInterfaceName("interface_" + scheduleJob.getJobId());
    log.info(">>>>> jobName = [" + scheduleJob.getJobName() + "]" + " created.");
}
If the job doesn't exist - we call scheduleNewJob() which schedules a new one, using our autowired JobScheduleCreator component from before:
private void scheduleNewJob(SchedulerJobInfo jobInfo) {
    try {
        Scheduler scheduler = schedulerFactoryBean.getScheduler();

        JobDetail jobDetail = JobBuilder
                .newJob((Class<? extends QuartzJobBean>) Class.forName(jobInfo.getJobClass()))
                .withIdentity(jobInfo.getJobName(), jobInfo.getJobGroup()).build();
        if (!scheduler.checkExists(jobDetail.getKey())) {

            jobDetail = scheduleCreator.createJob(
                    (Class<? extends QuartzJobBean>) Class.forName(jobInfo.getJobClass()), false, context,
                    jobInfo.getJobName(), jobInfo.getJobGroup());

            Trigger trigger;
            if (jobInfo.getCronJob()) {
                trigger = scheduleCreator.createCronTrigger(
                        jobInfo.getJobName(),
                        new Date(),
                        jobInfo.getCronExpression(),
                        SimpleTrigger.MISFIRE_INSTRUCTION_FIRE_NOW);
            } else {
                trigger = scheduleCreator.createSimpleTrigger(
                        jobInfo.getJobName(),
                        new Date(),
                        jobInfo.getRepeatTime(),

    SimpleTrigger.MISFIRE_INSTRUCTION_FIRE_NOW);
            }
            scheduler.scheduleJob(jobDetail, trigger);
            jobInfo.setJobStatus("SCHEDULED");
            schedulerRepository.save(jobInfo);
            log.info(">>>>> jobName = [" + jobInfo.getJobName() + "]" + " scheduled.");
        } else {
            log.error("scheduleNewJobRequest.jobAlreadyExist");
        }
    } catch (ClassNotFoundException e) {
        log.error("Class Not Found - {}", jobInfo.getJobClass(), e);
    } catch (SchedulerException e) {
        log.error(e.getMessage(), e);
    }
}
When creating a trigger, we pass in a MISFIRE_INSTRUCTION. Sometimes, Quartz can misfire a certain job. This can happen if the worker threads are busy, if the scheduler is down or if a job was scheduled to fire in the past, amongst similar issues.
We've set our triggers to MISFIRE_INSTRUCTION_FIRE_NOW - which fires again if a misfire occurs. If no MISFIRE_INSTRUCTION is defined, Quartz adopts a Smart Policy - MISFIRE_INSTRUCTION__SMART_POLICY.
Edit a Quartz Job
To edit jobs, we can use much the same method as for creating them - however, we have to inform the Scheduler to reschedule the job once its instructions are updated:
private void updateScheduleJob(SchedulerJobInfo jobInfo) {
    Trigger newTrigger;
    if (jobInfo.getCronJob()) {

        newTrigger = scheduleCreator.createCronTrigger(
                jobInfo.getJobName(),
                new Date(),
                jobInfo.getCronExpression(),
                simpleTrigger.MISFIRE_INSTRUCTION_FIRE_NOW);
    } else {

        newTrigger = scheduleCreator.createSimpleTrigger(
                jobInfo.getJobName(),
                new Date(),
                jobInfo.getRepeatTime(),
                SimpleTrigger.MISFIRE_INSTRUCTION_FIRE_NOW);
    }
    try {
        schedulerFactoryBean.getScheduler().rescheduleJob(TriggerKey.triggerKey(jobInfo.getJobName()), newTrigger);
        jobInfo.setJobStatus("EDITED & SCHEDULED");
        schedulerRepository.save(jobInfo);
        log.info(">>>>> jobName = [" + jobInfo.getJobName() + "]" + " updated and scheduled.");
    } catch (SchedulerException e) {
        log.error(e.getMessage(), e);
    }
}
Run a Quartz Job Once
Sometimes you would like to fire a trigger in an ad-hoc situation. You may also like to fire a job to test whether it's working fine or not before committing to a schedule.
We can use the triggerJob() method to fire it immediately without waiting for a scheduled cron or time. This allows us to create a testing hotkey:
public boolean startJobNow(SchedulerJobInfo jobInfo) {
    try {
        SchedulerJobInfo getJobInfo = schedulerRepository.findByJobName(jobInfo.getJobName());
        getJobInfo.setJobStatus("SCHEDULED & STARTED");
        schedulerRepository.save(getJobInfo);
        schedulerFactoryBean.getScheduler().triggerJob(new JobKey(jobInfo.getJobName(), jobInfo.getJobGroup()));
        log.info(">>>>> jobName = [" + jobInfo.getJobName() + "]" + " scheduled and started now.");
        return true;
    } catch (SchedulerException e) {
        log.error("Failed to start new job - {}", jobInfo.getJobName(), e);
        return false;
    }
}
Pause a Quartz Job
If you want to pause a running Cron Job or Simple Job, we can use the pauseJob() method, which will pause a job until you resume it:
public boolean pauseJob(SchedulerJobInfo jobInfo) {
    try {
        SchedulerJobInfo getJobInfo = schedulerRepository.findByJobName(jobInfo.getJobName());
         getJobInfo.setJobStatus("PAUSED");
        schedulerRepository.save(getJobInfo);
        schedulerFactoryBean.getScheduler().pauseJob(new JobKey(jobInfo.getJobName(), jobInfo.getJobGroup()));
      log.info(">>>>> jobName = [" + jobInfo.getJobName() + "]" + " paused.");
        return true;
    } catch (SchedulerException e) {
        log.error("Failed to pause job - {}", jobInfo.getJobName(), e);
        return false;
    }
}
Resume a Quartz Job
Naturally, we can resume a paused job by simply using the resumeJob() method:
public boolean resumeJob(SchedulerJobInfo jobInfo) {
    try {
      SchedulerJobInfo getJobInfo = schedulerRepository.findByJobName(jobInfo.getJobName());
      getJobInfo.setJobStatus("RESUMED");
      schedulerRepository.save(getJobInfo);
      schedulerFactoryBean.getScheduler().resumeJob(new JobKey(jobInfo.getJobName(), jobInfo.getJobGroup()));
      log.info(">>>>> jobName = [" + jobInfo.getJobName() + "]" + " resumed.");
      return true;
    } catch (SchedulerException e) {
      log.error("Failed to resume job - {}", jobInfo.getJobName(), e);
      return false;
    }
}
Delete a Quartz Job
Finally, we can delete a job by calling the deleteJob() method:
public boolean deleteJob(SchedulerJobInfo jobInfo) {
    try {
        SchedulerJobInfo getJobInfo = schedulerRepository.findByJobName(jobInfo.getJobName());
        schedulerRepository.delete(getJobInfo);
        log.info(">>>>> jobName = [" + jobInfo.getJobName() + "]" + " deleted.");
        return schedulerFactoryBean.getScheduler().deleteJob(new JobKey(jobInfo.getJobName(), jobInfo.getJobGroup()));
    } catch (SchedulerException e) {
      log.error("Failed to delete job - {}", jobInfo.getJobName(), e);
      return false;
    }
}
Quartz Management Console User Interface
Now, we've got all of the functionality required to bring our Quartz Management Console together with a web application user interface where we can test the features.
Note: The UI of this application is to demonstrate the Lifecycle Management of a Scheduler and UIs are much more variable than the back-end. We will not focus much on its implementation because of this. However, you can access the full code for the front-end on our GitHub repository.
Any REST API that triggers the methods we've defined before will work just fine. Our implementation uses “Thymeleaf” as the rendering engine.
If you'd like to learn more about “Thymeleaf”, read Getting Started with Thymeleaf in Java and Spring.
If you would like to learn more about building a REST API, read our Guide to Building a REST API with Spring Boot.
Once you run your application, let's navigate to http://localhost:8080/index, too see the dashboard.
First, let's select the Create button to create a new job. It will open a pop-up and prompt us to fill in the Job Details.
Let's create a Cron Job and a Simple Job:


We can see all of the added jobs in the JobStore:

You can also view the job logs - when the jobs get triggered, one by one, based upon their trigger criteria.
Conclusion
In this guide, we've gotten introduced to Quartz - a powerful scheduler and implemented it into a Spring Boot application.
We looked into the overall Lifecycle Management of a Quartz Scheduler with a demonstration in a simplistic UI. We have used some minimalistic jobs, but you can try defining complex Jobs like fire email alerts or asynchronous message processing, etc., and schedule it with Quartz.
As always, you can find the full source code at <a rel=”nofollow noopener” target="_blank" href="https://github.com/StackAbuse/spring-boot-quartz">GitHub.

