Introduction
Please note: The following article will be dedicated to testing Spring Boot applications. It's assumed that you are familiar with at least the basics of Java, Maven and Spring Boot (Controllers, Dependencies, Database Repository, etc).
There is a general lack of testing in most organizations. Maybe even your team is one of those teams that have good intentions on testing, but it always gets put off or forgotten as the projects get rolling.
Why is testing so hard to do consistently? Testing benefits are well-known, and yet, why is it so often overlooked?
l think there are a couple of reasons testing has a lower importance on most teams. First, creating, integrating and maintaining tests can often be difficult. And second, unless you're an engineer that has done a lot of testing, and seen its importance and value, you probably won't place it high on your priority list to learn and make a part of your development process.
Fortunately, Spring Boot is making integrating and working with tests easier than ever before.
Getting started with Spring Boot testing
When it comes to testing there are several different types of tests that you can write to help test and automate the health of your application. However, before we can start doing any testing we need to integrate the testing frameworks.
With Spring Boot, that means we need to add a starter to our project dependencies, for testing we only need to add the spring-boot-starter-test dependency:
<dependency>
    <groupId>org.springframework.boot</groupId>
    <artifactId>spring-boot-starter-test</artifactId>
    <version>{version}</version>
    <scope>test</scope>
</dependency>
This single dependency will get you set up with most of your testing needs.
JUnit and Hamcrest
The first framework that test starter will integrate is JUnit.
JUnit has been around for a long time, and if you've ever unit tested in Java, you've most likely used this framework before. When doing basic unit testing, JUnit and Spring complement each other well, as you'll see in some upcoming demos. Even though JUnit provides some assertion support to help analyze test results, Spring Boot also incorporates Hamcrest. This framework provides improved test results matching and assertions, that when combined with JUnit allow you to automate your testing from start to finish.
Mockito
The next framework that test starter integrates is Mockito. Sometimes, when testing, the code you're trying to test is a dependency for another object. Sometimes, it's simply a piece of code that's hard to prop up for a unit test. In such cases, using a framework like Mockito to mock and stub those objects is the solution. This way, you can proceed with your tests and then verify what was called and used on that object after your test is run.
Spring Tools
Last, the test starter dependency pulls in the Spring test tools.
These include annotations, test utilities, and other testing integration support that allow working with JUnit, Hamcrest, and Mockito within the Spring environment.
Starting Spring Boot Project
For the rest of this article, we'll be setting up and working with different test aspects in our Spring Boot application.
In this section, we're going to get our application and environment set-up for testing. The first thing that needs to happen is we need to add the spring-boot-starter-test to our project's dependencies.
Only after adding it, we can build up a simple unit test to see how the basics work. Afterwards, we'll want to cover a couple of different ways that you can run tests within Spring Boot.
You can either create the Spring Boot project via your IDE or generate it using Spring Initializr.
In both cases, add the web dependency, which includes a test-starter dependency in your project otherwise, you'll have to add it manually:
pom.xml:
<dependency>
    <groupId>org.springframework.boot</groupId>
    <artifactId>spring-boot-starter-test</artifactId>
    <scope>test</scope>
</dependency>
When adding it manually, adding it to the bottom of the pom.xml file will make Maven pull all your test resource dependencies.
One thing to note on this dependency is that it includes the scope of test <scope>test</scope>. That means that when the application is bundled and packaged for deployment, any dependencies that are declared with the test scope are ignored. The test scope dependencies are only available when running in development and Maven test modes.
Now that we have our testing libraries in place, we can go ahead and create a test.
JUnit Testing
It's the most common practice for all testing related code to go in the src/test/java folder. The Maven archetype that generated the project initially included a test class called e.g. DemoApplicationTests - based on the name of your main class, in that very package.
Now we just need something to test.
Let's define a simple controller in our src/main/java folder:
HomeController:
@RestController
public class HomeController {

    @RequestMapping("/")
    public String home() {
        return "Hello World!";
    }
}
This controller has a single method, returning a string, which is run when we access the root of our application. That kind of behavior is expected from this controller, but let's test it and see if it behaves correctly:
JUnitControllerTest:
public class JUnitControllerTest {

    @Test
    public void testHomeController() {
        HomeController homeController = new HomeController();
        String result = homeController.home();
        assertEquals(result, "Hello World!");
    }
}
assertEquals is static method which from the org.junit.Assert package, and only one of the assertion methods used in JUnit:
| assertEquals | Checks if two primitive types or objects are equal. |
| assertTrue | Checks if input condition is true. |
| assertFalse | Checks if input condition is false. |
| assertNotNull | Checks if an object isn't null. |
| assertNull | Checks if an object is null. |
| assertSame | Checks if two object references point to the same object in memory. |
| assertNotSame | Checks if two object references do not point to the same object in memory. |
| assertArrayEquals | Checks whether two arrays are equal to each other. |
We start off our test by instantiating our HomeController. There's no need to rely on dependency injection for this. We're using the assertEquals method to check whether the returned value from our method matches another string.
This is a simple, yet functional and completed unit test. We've integrated the testing frameworks, created a JUnit test by flagging the method with a @Test annotation after which we performed a test assertion.
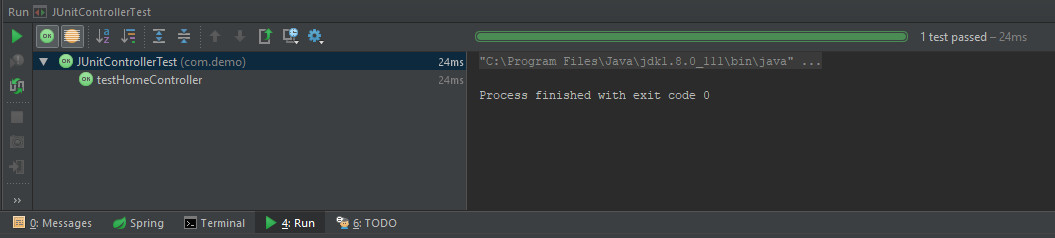
Now, we're supposed to run the test and observe the result – and there are multiple ways to run tests:
The first way is to simply right-click on the whole test, or the test name if you wish to run a single test. Afterwards, select "Run as JUnit". This commences the test on your IDE:

If we altered our test, and the strings no longer matched, we would be prompted with a different kind of result:

Another way that you can run your project tests would be from the command line or the terminal - if you have Maven set up on the command line, and are working with Maven, you can run the Maven test command from the root of your project to get the same results:
$ mvn test
Mockito Testing
The previous test we created was very simple. It returned some static text and so it was quite easy to test.
As applications grow in complexity, you can't simply test units this way. The code you're testing might have dependencies on other code that is managed by Spring or is difficult to construct via a test. In that case, we can use Mockito to help us test.
Let's create a new test class inside src/test/java:
@RestController
@RequestMapping("api/v1/")
public class UserController {

    @Autowired
    private UserRepository userRepository;

    @RequestMapping(value = "user/{id}", method = RequestMethod.GET)
    public User get(@PathVariable Long id) {
        return userRepository.findOne(id);
    }
}
The goal of this method is to get a User by their id so we're going to test if it does what it's supposed to. We start by instantiating our controller, and then calling the get() method:
public class MockitoControllerTest {

    @Test
    public void testGetUserById() {
        UserController userController = new UserController();
        User user = userController.get(1L);
        assertEquals(1l, user.getId().longValue());
    }
}
We ask for the User with the id of 1. Then we simply need to run an assertion on the returned object to make sure that the id is indeed equal to 1 as expected.
If we run the test, notice the results:

Our test failed with a NullPointerException. It appears that userRepository is equal to null.
This is because we instantiated the UserController and we didn't use Spring to inject it, so all of the injected objects used by the UserController, like the userRepository, never got created properly by Spring.
This is the exact problem that mock frameworks were created for. By using Mockito, we can mock the userRepository so we can get our test to work:
public class MockitoControllerTest {

    @InjectMocks
    private UserController userController;

    @Mock
    private UserRepository userRepository;

    @Before
    public void init() {
        MockitoAnnotations.initMocks(this);
    }

    @Test
    public void testGetUserById() {
        User u = new User();
        u.setId(1l);
        when(userRepository.findOne(1l)).thenReturn(u);

        User user = userController.get(1L);

        verify(userRepository).findOne(1l);

        assertEquals(1l, user.getId().longValue());
    }
}
Instead of instantiating the UserController, we want to create a mock instance of it. Mockito provides an annotation that creates this object and injects it into the test. We use the @InjectMocks annotation, and this produces a private attribute called userController which Mockito is managing for us.
Check out our hands-on, practical guide to learning Git, with best-practices, industry-accepted standards, and included cheat sheet. Stop Googling Git commands and actually learn it!
Next, we created the userRepository mock object and this fixes our NullPointerException when testing the controller. We use another Mockito annotation for that - @Mock.
Next, we added the set-up method that initializes all of the mocked objects together when the test runs. The method annotated with @Before gets ran before each test method. The init() method runs MockitoAnnotations.initMocks(this) using this instance as the argument. This sets up our mocks before each test.
Passing this instance will make Mockito acknowledge the @InjectMocks and the @Mocks annotations and that they should be pushed together.
In this case, since the UserController contains a userRepository in it, the Mockito framework will go ahead and set that up for us, much like the Spring container would via dependency injection.
You might be surprised by the use of when() in this example. It's another static import provided by Mockito. Let's go through this step by step and its purpose will be clear.
Firstly, we've created a new User object and set the id to 1. The when() method allows us to provide the actual mocking behavior. This is telling Mockito that when the findOne method is called on the repository, the returned User should be stubbed.
What this means is that the returned class is a fake one with preprogrammed return values and not a real returned object from the database. This allows us to test the unit without actually having to connect to the database or Spring at all.
The other useful feature Mockito provides is the ability to verify that our mocked or stubbed method calls are actually used during the testing process.
We can place a verify check to see if the stubbed method is actually called - in our case findOne(). This is yet another way that you can flesh out how well your code is working.
If, for some reason, the controller called the findOne() method more than once, the test would fail instantly and provide you with information that would help pinpoint the offending logic and fix it gracefully.
After applying these changes, re-running the test will result in a beautiful green pass:

You can see that the possibilities now become endless when testing units, even complex code. It does take a somewhat more time to set up, but you can now test controllers, services, or any other kind of object, without having to run an integration test that boots up the Spring container.
Unit tests with mock objects are fast - much faster than integration tests.
Hamcrest Matchers
In the previous test, we used both JUnit assertions to verify test results as well as Mockito's verify to make sure mocked objects were called appropriately. That being said, why integrate another framework to just handle matching and assertions of test results?
Hamcrest provides a more readable, declarative approach to asserting and matching your test results. Many developers are beginning to prefer the syntactic sugar of Hamcrest over the other assertion methods. To see how Hamcrest works, we going back to MockitoControllerTest test located in the src/test/java folder:
import static org.hamcrest.MatcherAssert.assertThat;
import static org.hamcrest.Matchers.*;

public class MockitoControllerTest {

    @InjectMocks
    private UserController userController;

    @Mock
    private UserRepository userRepository;

    @Before
    public void init() {
        MockitoAnnotations.initMocks(this);
    }

    @Test
    public void testGetUserById() {
        User u = new User();
        u.setId(1l);
        when(userRepository.findOne(1l)).thenReturn(u);

        User user = userController.get(1L);

        verify(userRepository).findOne(1l);

        //assertEquals(1l, user.getId().longValue());
        assertThat(user.getId(), is(1l));
    }
}
In the testGetUserById() test case, the test is performed using a JUnit assertion - assertEquals. It checks to see whether the id of the returned object matches 1 or not.
We can change this with Hamcrest's assertThat() static method. Please note that the logic of the test, as well as the code being tested remain untouched - in fact, the new line is logically equivalent to the previous JUnit assertion.
This still begs the question, if they're logically the same, why include another framework? Comparing these two assertions, it's evident that Hamcrest's assertion is more readable and less offending to the eyes. Also, it's easier to see what's the ultimate goal of the test assertion with just a glance.
The assertion assertThat() is a simple equality comparison, although Hamcrest provides many options and matcher besides this one. Including them all in a table would be insane, so please refer to the official Hamcrest documentation if you're interested in reading about them.
Integration Testing
The last type of testing that we will cover is the concept of Integration testing.
Integration testing is all about testing all pieces of an application working together as they would in a live or production environment. This means that our application essentially needs to be running to test it. Because of the nature of integration tests, this poses some challenges when building and running these types of tests.
Before Spring Boot, there were some challenges that Spring applications tended to run into.
Integration Testing Problems
Traditional Spring Applications
Containers are difficult to test:
Any code that is part of your application that relies on the container or the servlet specification is hard to test because you either need to test the startup of the container and run tests against it, or you need to mock the container and emulate it in some other way.
Spring Context needs to be available:
Since Spring Core, Spring Beans and dependency injection requires Spring to be running and managing those pieces in its application context. All integration tests need to ensure that the Spring application context is running.
Application/Test startup can be slow:
Starting the Spring context and running or emulating the container can take time in larger applications. Integration tests naturally run slower than plain unit tests. You can imagine that as you add more and more integration tests, the testing time required to run them all can increase dramatically.
Database state needs to be consistent:
If your integration tests are modifying the database, or expecting certain data in the database to be there for your test case, then you can run into problems if you can't make your database stay consistent every time you run your tests.
Spring Boot Applications
No container, easier to start the application:
Because Spring Boot applications can be started as a plain Java application, the complexity of dealing with a container and deploying your application is removed. Granted, Spring Boot still does have an embedded container, but Spring Boot simply makes starting and dealing with your application much easier.
Spring Context auto-configuration:
Integration tests in Spring Boot still need to have a Spring context. The main difference between Spring Boot and traditional Spring apps is the use of starters and auto-configuration. This makes propping up the Spring container with Spring Boot a little easier.
App/Test startup can be slow:
Integration test startup and execution time are still issues in the Spring Boot environment. The bigger your application and more Spring components you have, the longer it will take to start your application.
Database state needs to be consistent:
Database consistency is also still an issue with Spring Boot testing.
With all these problems, integration tests still are one of the best ways to make sure your application, as a whole, is working as intended and designed.
When it comes to integration testing, the Spring Boot applications really start to shine over conventional Spring applications. To convert any JUnit test into a proper integration test, there are really two basic things that you need to do.
The first is you need to annotate your tests with the @RunWith annotation and specify that you want to run it with the SpringJUnit4ClassRunner.class.
The second is you need to add the @SpringApplicationConfiguration annotation and provide your main Spring Boot class for your application.
This test will be responsible for testing the UserRepository Spring Data object:
@RunWith(SpringJUnit4ClassRunner.class)
@SpringApplicationConfiguration(Demo.class)
public class UserRepoIntegrationTest {
    @Autowired
    private UserRepository userRepository;

    @Test
    public void testFindAll() {
        List<User> users = userRepository.findAll();
        assertThat(users.size(), is(greaterThanOrEqualTo(0)));
    }
}
This test is asking the repository for all users, and then using Hamcrest to make sure that the return list is greater than or equal to 0. Now when the test starts up the Spring context will load and Spring will inject the full userRepository into the test, just like it would if it were running in a standard application.
Regardless of the test result - successful or unsuccessful, open your IDE Console tab and you should notice that it looks like your application started (Spring logo, info etc). This happens because our application actually starts with integration tests. Essentially each integration test will boot up your app, and this is one reason why integration tests can take a while if you have a really large application or you have a lot of tests.
You might think that you've reached the zenith of testing with Spring Boot, but there is one area that we still didn't cover at all and that's the actual REST API that your controllers expose.
Now that JavaScript, MVC, and mobile apps like to have a REST API to talk to, rather than a templated JSP page, it's nice to be able to test that actual API. That, in turn, tests your entire server-side stack. So this is the concept of a web integration test.
Spring provides a simple annotation that flags an integration test as a web integration test @WebIntegrationTest. As usual, inside your src/test/java folder create a class:
@RunWith(SpringJUnit4ClassRunner.class)
@SpringApplicationConfiguration(Demo.class)
@WebIntegrationTest
public class UserControllerWebIntegrationTest {

    @Test
    public void testListAll() throws IOException {
        RestTemplate restTemplate = new TestRestTemplate();
        ResponseEntity<String> response = restTemplate.getForEntity("http://localhost:8080/api/v1/users", String.class);

        assertThat(response.getStatusCode(), equalTo(HttpStatus.OK));

        ObjectMapper objectMapper = new ObjectMapper();
        JsonNode responseJson = objectMapper.readTree(response.getBody());

        assertThat(responseJson.isMissingNode(), is(false));
        assertThat(responseJson.toString(), equalTo("[]"));
    }
}
The first thing that we're doing is creating a REST Template - RestTemplate is how we can programmatically call APIs, and in this case, we want to programmatically call the User API.
The API call is requesting all of the users in the system, and it holds the response. Although I did hard-code the server URL here for tutorial purposes but this is something that you could, and most definitely should move to the application.properties file, or configure your tests so that it points to your test environment, rather than your development environment.
Next, we run an assertion to make sure that we get a 200 OK back as a response - and if not, the test will fail immediately.
We then want to convert the response into an actual JSON object and perform assertions on it to make sure that the returned JSON object is in a state that makes sense for our application.
Since our database doesn't actually hold any users, and quite frankly, doesn't exist - we'll be checking to make sure that we get an empty array returned as our JSON payload - equalTo("[]").
Again, these tests are very expensive to run, so they may be something that you want to set up only on a continuous build server, and run them every time someone on your team checks
something in or adds something to your code repository.
Conclusion
Since Spring Boot integrates JUnit, Mockito, and Hamcrest, l wanted to cover how to use these tools within a Spring Boot app. Just like most of the frameworks we've included with our Spring Boot test cases, you could, and should, spend some time looking at each of frameworks on their own, as they provide really useful tools for development.
To start writing tests in your projects really doesn't take much effort when you're integrating with Spring Boot. Start getting in the habit of testing because it will definitely set you apart from other developers. It will help write higher quality code as you essentially will do a code review of your own work while you're attempting to test it.
As you've seen with the examples that we've covered, there are a lot of options with testing in a Spring Boot application. And even though we've lightly covered what's possible, you should get in a habit of actually writing some tests for some of the code that you produce on your application, even if you're still learning and testing around with the code. The more you do, the easier it will get over time.
Remember that Spring Boot is all about dependency management with its starters. Those starters often provide auto-configuration that gets frameworks integrated into your application easily and quickly.
You can then override and customize application needs using the application.properties file. Spring Boot frees you from container deployments by embedding the container within the application so you're now free to run your Java application anywhere. This makes cloud deployments or things like testing your application a lot easier.
Be sure to take time and look at the official Spring Boot testing documentation for more information.

