
Introduction
In this article, we will discuss how to integrate PostgreSQL with Node.js.
In order to better follow this article, we'd recommend that you have prior experience using Node.js and SQL statements. We will be using simple javascript ES6 syntax in this article.
There are a few different clients you can use to integrate PostgreSQL with Node.js. In this article, we will be using the node-postgres module. It is a popular and matured module compared to other PostgreSQL clients.
Also, you can use PostgreSQL with an ORM such as Sequelize as well. But we won't use using such an ORM module in this article. Instead, we will use plain SQL queries, which you can then build off of for more complex database interactions.
PostgreSQL
PostgreSQL is a popular SQL database. It has been in active development for the last 30+ years and is considered to be one of the most advanced relational databases out there. PostgreSQL is also easy to learn and setup compared to other relational databases available. Because of its free and open-source nature, this is a popular choice among startups.
PostgreSQL is a cross-platform database that runs on all major operating systems. The configuration and access/database creation slightly differs between operating systems, though.
In this article, we'll will be using Ubuntu 18.04, which is a popular Linux platform and includes PostgreSQL by default. Some steps might be a little bit different if you are using a different operating system.
Project Configuration
Let's get started with a simple blank Node.js project with the default settings:
$ npm init -y
Then, let's use npm to install the node-postgres module, which will be used to connect to and interact with Postgres:
$ npm install --save pg
Implementing CRUD Operations
With our project bootstrapped, let's go ahead and configure the database. After that, we'll write some basic CRUD functionality.
Database Configuration
As with all relational databases, we'll start off by creating one and connecting to it. You can either use the CLI or a GUI-based client to do this. Since it's very simple to set up through the CLI, we'll be doing just that.
For Ubuntu, the default psql command will enter the CLI. PostgreSQL will create a user called postgres to access the database in Linux-based platforms. Thus, we can use the following command to login as the postgres user:
$ sudo -i -u postgres
Then enter the CLI by running:
$ psql
You should see a command shell similar to this:

To view the currently present databases, let's use the \list or \l command:

And now, let's create our own using an SQL query:
CREATE DATABASE testdb;
By running this command, we're creating a testdb database and greeted with the output, confirming our command:
CREATE DATABASE
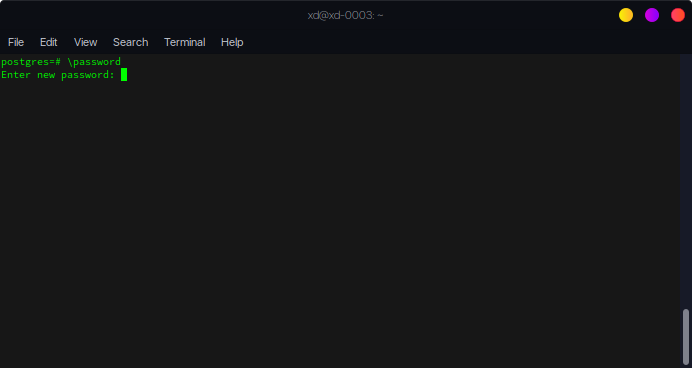
Since the database is created, we can now access it. While PostgreSQL creates a default postgres user, the password isn't set by default. If you'd like to set your password (rather than leaving it blank), use the \password command:
With your password set, we're ready to use the database in our project.
Connecting to the Database
You have two options that you can connect to a PostgreSQL server with the node-postgres module. One of the options is to use a single client. The other method is to use a connection pool. However, if your application is using the database very frequently, the pool will be a better option than using a single client.
Connecting to the database using the node-postgres module can be done in two ways - using a single client and using a connection pool.
We will take a look at how to use a connection pool to connect to the database later in this article. For the moment, let's connect to the database using a single client for brevity and simplicity:
const { Client } = require('pg');

const client = new Client({
    user: 'postgres',
    host: 'localhost',
    database: 'testdb',
    password: '1234abcd',
    port: 5432,
});

client.connect();
Here, we've manually configured the options. However, you can connect to the database without passing any of those:
const { Client } = require('pg');

const client = new Client();
client.connect();
But then again, Node needs to know how to connect to the database, so we'll supply them through environment variables:
PGUSER=dbuser
PGHOST=database.server.com
PGPASSWORD=secretpassword
PGDATABASE=mydb
PGPORT=3211
If you haven't configured them yourself, the module will use the default values:
PGHOST='localhost'
PGUSER=process.env.USER
PGDATABASE=process.env.USER
PGPASSWORD=null
PGPORT=5432
On Linux, the process.env.USER will hold the value for the current user that is logged in.
Creating Tables
With the database prepped for data-insertion, let's create some tables to store our data in. As with all SQL-based databases, we'll use the CREATE TABLE query:
CREATE TABLE [table_name] (
    [column1] [datatype],
    [column2] [datatype],
    [column3] [datatype],
   ....
);
A table consists of columns, and each column has a data type. For example, a firstName column would have varchar as the data type, which represents a String of variable size.
If you'd like to read more about the supported data types, the PostgreSQL Documentation lists them nicely.
That being said, we can use this query to create a table in the database:
const query = `
CREATE TABLE users (
    email varchar,
    firstName varchar,
    lastName varchar,
    age int
);
`;
To actually run this query against the database, we use the query() function from the client object we set up before:
client.query(query, (err, res) => {
    if (err) {
        console.error(err);
        return;
    }
    console.log('Table is successfully created');
    client.end();
});
Note: Don't forget to end() your connection to the client after you've ran the query.
Running this code will create our table and print out:
Table is successfully created
This can also be achieved using promises and async/await. Since a database call might fail, it makes more sense to use promises:
client
    .query(query)
    .then(res => {
        console.log('Table is successfully created');
    })
    .catch(err => {
        console.error(err);
    })
    .finally(() => {
        client.end();
    });
As you can see in the example we can use the finally block to close the connection with the database. So even if the query threw an err, the connection will be closed.
Alternatively, we can use the async/await syntax as well:
try {
    const res = await client.query(query);
    console.log('Table is successfully created');
} catch (err) {
    console.log(err.stack);
} finally {
    client.close();
}
All of these approaches should yield the same result:
Table is successfully created
To verify this, let's use the psql command line interface to inspect the DB. Open a terminal, start the shell with psql, and select the database using the \c [database] command. \c is shorthand for \connect:
\c testdb
Then you can list the tables in the database testdb by running the \dt command:

You can also query for specific tables by providing their names:
testdb=# \dt FOO
This query will display the table named FOO.
Creating/Inserting Data
We can use the SQL INSERT INTO statement to insert data into a table:
INSERT INTO [table_name] ([column1], [column2], [column3], ...)
VALUES ([value1], [value2], [value3], ...);
To make this query concrete, let's insert our own values and construct a query:
const query = `
INSERT INTO users (email, firstName, lastName, age)
VALUES ('[email protected]', 'john', 'doe', 21)
`;
And finally, let's run the query against the database:
client.query(query, (err, res) => {
    if (err) {
        console.error(err);
        return;
    }
    console.log('Data insert successful');
    client.end();
});
Note: The same as last time, this function can be written using the async/await syntax. These additional examples are omitted for brevity.
Check out our hands-on, practical guide to learning Git, with best-practices, industry-accepted standards, and included cheat sheet. Stop Googling Git commands and actually learn it!
Running this code will insert a user into our database and print out:
Data insert successful
To verify this, in our testdb database, run the SELECT statement:
SELECT * from users;
We can obviously see that the user was indeed created successfully:

Retrieving/Selecting Data
To retrieve data from the database, the SELECT statement is used:
SELECT [column1], [column2], ...
FROM [table_name]
WHERE [condition];
You can select specific columns by specifying them or select all the fields of a table using the * wildcard. Optionally, you can get creative with more conditionals using the WHERE statement.
Here we select all rows and all columns from the users database:
const query = `
SELECT *
FROM users
`;
Now, to run this query against the database, we'll use the client again:
client.query(query, (err, res) => {
    if (err) {
        console.error(err);
        return;
    }
    for (let row of res.rows) {
        console.log(row);
    }
    client.end();
});
Running this code will yield:
{
email: '[email protected]',
firstname: 'john',
lastname: 'doe',
age: 21
}
{
email: '[email protected]',
firstname: 'anna',
lastname: 'dias',
age: 35
}
This query returns all users added to the database. You can also filter the users by their fields.
For example, if we wanted to return all users younger than 30, we'd add a WHERE clause:
const query = `
SELECT *
FROM users
WHERE age<30
`;
And then, we'd run it against the database:
client.query(query, (err, res) => {
    if (err) {
        console.error(err);
        return;
    }
    for (let row of res.rows) {
        console.log(row);
    }
    client.end();
});
Running this code will yield:
{
email: '[email protected]',
firstname: 'john',
lastname: 'doe',
age: 21
}
Updating Data
To update data that already exists, we can use the UPDATE statement:
UPDATE [table_name]
SET [column1] = [value1], [column2] = [value2], ...
WHERE [condition];
You can set each updated value for each column with the SET keyword. After the WHERE clause, you can define the condition of which entries should be updated.
Let's populate our query:
const query = `
UPDATE users
SET age = 22
WHERE email = '[email protected]'
`;
Now, let's run the query against the database:
client.query(query, (err, res) => {
    if (err) {
        console.error(err);
        return;
    }
    if (err) {
        console.error(err);
        return;
    }
    console.log('Data update successful');
    client.end();
});
Running this piece of code will update the entries satisfying the WHERE clause and print out:
Data update successful
To verify, let's check our database:
Deleting Data
Finally, to delete data, we can use the DELETE statement:
DELETE FROM [table_name]
WHERE [condition];
Be careful with this statement as you might accidentally delete more than you're aiming for.
Let's populate our query:
const query = `
DELETE FROM users
WHERE email = '[email protected]'
`;
And finally, run it against the database:
client.query(query, (err, res) => {
    if (err) {
        console.error(err);
        return;
    }
    if (err) {
        console.error(err);
        return;
    }
    console.log('Data delete successful');
    client.end();
});
Running this code will delete the entry satisfying the WHERE clause and print out:
Data delete successful
To verify, let's take a look at the database:

Pooling
If your application is using the database frequently, using a single client connection to the database will likely slow down the application when you have many user requests. The easiest and most convenient way to address that problem is to use a connection pool.
Usually, when a new client connects to the database, the process of establishing a connection and authenticating takes around 20-30 milliseconds. This is significant when you're running more queries leading to seconds of delay, which will likely end up being an unsatisfactory end-user experience.
Also, the PostgreSQL server can only handle a limited number of clients at a given time which will depend on your server memory. So if 100 queries are going on in a second - this limitation might crash your server.
Additionally, the client can process only one request at a time for a single connection which further slows things down.
In a situation like this, you can use the pg-pool module to solve that.
Creating a Pool
First import the Pool Class from the pg module:
const { Pool } = require('pg');
Then, let's create a new pool object:
const pool = new Pool({
    user: 'postgres',
    host: 'localhost',
    database: 'testdb',
    password: '1234abcd',
    port: 5432,
});
If you do not configure the username, host, and other properties, you'd have to define environment variables for these in a configuration file. It's pretty much the same as when configuring a single client.
Next, let's define an error handler for the pool. If there are any errors throwing from the pool, the callback in this event will be fired:
pool.on('error', (err, client) => {
    console.error('Error:', err);
});
This covers us in case of a network error.
Then, using the pool object, we connect to the database and use a client in that pool to execute a query:
const query = `
SELECT *
FROM users
`;

pool.connect((err, client, done) => {
    if (err) throw err;
    client.query(query, (err, res) => {
        done();
        if (err) {
            console.log(err.stack);
        } else {
            for (let row of res.rows) {
                console.log(row);
            }
        }
    });
});
This should yield:
{
  email: '[email protected]',
  firstname: 'john',
  lastname: 'doe',
  age: 21
}
{
  email: '[email protected]',
  firstname: 'anna',
  lastname: 'dias',
  age: 35
}
Again, it makes more sense to use promises in this case:
pool.connect()
    .then((client) => {
        client.query(query)
            .then(res => {
                for (let row of res.rows) {
                    console.log(row);
                }
            })
            .catch(err => {
                console.error(err);
            });
    })
    .catch(err => {
        console.error(err);
    });
Or even the async/await syntax:
(async () => {
    try {
        const client = await pool.connect();
        const res = await client.query(query);

        for (let row of res.rows) {
            console.log(row);
        }
    } catch (err) {
        console.error(err);
    }
})();
Using the Cursor to Read Large Queries
Usually, the data received from a query is loaded straight into the memory. The larger the data set, the higher the memory usage will be.
So when you are trying to query a large data set that might contain tends of thousands of records - it's highly inefficient to load it all in the memory and oftentimes, it's plain impossible. A cursor can help you in a situation like this by retrieving a limited number of records at a time.
In a sense, using a cursor is similar to streaming data since you'll access it sequentially in smaller blocks. In order to use the cursor, we have to install the pg-cursor module first:
$ npm install --save pg pg-cursor
We'll be passing a new Cursor to the query() function. The cursor won't actually retrieve any information until we specify the limit using the read() method:
const { Pool } = require('pg');
const Cursor = require('pg-cursor');

const pool = new Pool({
    user: 'postgres',
    host: 'localhost',
    database: 'testdb',
    password: '1234abcd',
    port: 5432,
});

(async () => {
    const client = await pool.connect();
    const query = 'SELECT * FROM users';

    const cursor = await client.query(new Cursor(query));

    cursor.read(1, (err, rows) => {
        console.log('We got the first row set');
        console.log(rows);

        cursor.read(1, (err, rows) => {
            console.log('This is the next row set');
            console.log(rows);
        });
    });
})();
The cursor's read() method lets us define how many rows we want to retrieve from the current cursor instance. In this example for simplicity, we have limited the rows for one record. Then we have read another set of rows after that.
If you've reached the end of the rows in the database, the rows array will be of length 0.
Conclusion
PostgreSQL is a really popular, free, open-source relational database. The node-postgres module is a widely-employed and matured module that bridges Node.js to PostgreSQL.
In this article, we've set up a PostgreSQL database and developed basic CRUD functionality through a simple Node.js script. Then, we've explored pooling support and the usage of cursors to limit the retrieved data.
As always the source code is available on GitHub.

