
Overview
In this article, we'll look into Spring Boot Actuator, which provides built-in production ready endpoints that can be used for monitoring and controlling your application.
Monitoring applications may include something as simple as knowing the Health and Info to some complex data like understanding Traffic and Metrics for our application. For example, how much resources (CPU, RAM, etc.) are being used by the application.
You can choose to interact with actuators either with HTTP endpoints or with JMX beans. In this tutorial, we would be using the HTTP endpoints.
In Spring Boot 1, the actuator could only be used with Spring MVC. But with Spring Boot 2 and the introduction of WebFlux, its support has been extended and can also be used with the Jersey framework without the need of Spring MVC in the classpath.
Spring Boot Actuator
In order to demonstrate the actuator in work, we'll be using a simple Spring REST-based service, running on the default port (8080) with a single endpoint of /hello that returns a String message.
To add actuator, we simply add the dependency to our pom.xml file:
<dependency>
    <groupId>org.springframework.boot</groupId>
    <artifactId>spring-boot-starter-actuator</artifactId>
    <version>${VERSION}</version>
</dependency>
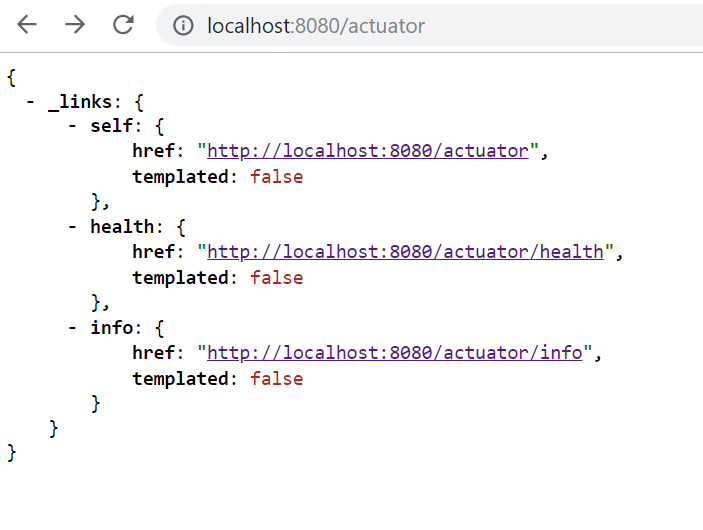
All the endpoints fall under a common prefix of /actuator. To check, let's navigate our browser to http://localhost:8080/actuator:
Note: In Spring Boot 1, all of the actuator endpoints were in the root base path, i.e /, but in Spring Boot 2, all of them are by default grouped under /actuator.
You can change the base path of the actuator endpoints by adding the following properties in the application.properties:
management.endpoints.web.base-path=/admin
management.server.port=8090
Now, all the actuator endpoints will be under the /admin prefix, which makes sense since only an admin should have access to metrics such as these. For this tutorial, we are going to leave it under the default /actuator.
By default, management endpoints are available on the same port as that of your application, but you may choose to expose these on a different HTTP port by setting the management.server.port to an HTTP port of your choice.
We will not be changing it as the default behavior is preferable especially if you are running on the cloud.
Actuator Endpoints
A full list of available endpoints can be seen in the official documentation. You may have noticed that although there are many endpoints available, the result of http://localhost:8080/actuator shows only /health and /info.
Since actuator endpoints contain sensitive information, we have had to explicitly expose each of them, otherwise, we'll only be able to see rudimentary information that's already apparent.
Navigate our browser to http://localhost:8080/actuator/health:

Now, let us check the /info similarly and you will notice that it returns an empty response.
This is because we have not provided any information about it to Spring. This can be done by adding properties to the info prefix in the application.properties:
info.name= Test Spring Service
info.more.detail= This is a demo for Spring Actuator

You can structure the JSON key according to your needs.
Exposing Endpoints
In order to expose endpoints, Spring provides 2 properties that we can use individually or in combination:
management.endpoints.web.exposure.exclude: Used to exclude a list of endpoints that we do not want to expose. The default value for it is empty.management.endpoints.web.exposure.include: Used to include a list of endpoints that we want to expose. The default value for it isinfo, health. This is why both these endpoints were available by default.
Note: exclude takes precedence over include
So, let's tweak the configuration so that we want to expose all of the endpoints except for info and health:
management.endpoints.web.exposure.include=*
management.endpoints.web.exposure.exclude=info,health
Note: If you are using a YAML-based properties file, * has a special meaning and can only be used with quotes:
management:
  endpoints:
    web:
      exposure:
        exclude: "*"
For this tutorial, we will be exposing all of our actuator endpoints. So let's add the following endpoint in our application.properties:
management.endpoints.web.exposure.include= *
Now, let's check the actuator endpoint again by opening http://localhost:8080/actuator:

Enabling Endpoints
Besides exposing endpoints, we can also enable and disable them. While exposing only regulates whether we can see them or not, enabling regulates whether they exist as a bean in the context of Spring.
Check out our hands-on, practical guide to learning Git, with best-practices, industry-accepted standards, and included cheat sheet. Stop Googling Git commands and actually learn it!
By default, all the endpoints are enabled except for one, the shutdown endpoint. You can enable/disable each endpoint by setting the management.endpoint.<id>.enabled property:
management.endpoint.shutdown.enabled=true
management.endpoint.beans.enabled=false
You can also disable all endpoints by setting management.endpoints.enabled-by-default to false and then individually enable the properties you want. For this tutorial, we would be going with the default setting.
Note: Disabling the endpoints will remove them as beans from the context completely and it wouldn't matter if you have exposed them.
Caching Support
All the endpoints (that are READ operation and do not take any parameter) have basic caching support as well.
Every endpoint has a property of cache.time-to-live that's automatically generated for you which can be used to specify the cache time:
management.endpoint.beans.cache.time-to-live=10s
Securing Actuator Endpoints
By now, it would have been clear that these endpoints store sensitive information about our application and it would be a good idea to secure them.
To do it we can simply add spring security to our application by adding the spring-boot-starter-security dependency in our pom.xml:
<dependency>
    <groupId>org.springframework.boot</groupId>
    <artifactId>spring-boot-starter-security</artifactId>
    <version>${VERSION}</version>
</dependency>
By default, just by importing it, all of the endpoints in our application will be secured.
But let's suppose we want our /health endpoint available to all, but the rest of them to be secure. This warrants a custom filter for letting certain users pass and holding back others.
For that we have to add a @Configuration class that extends the WebSecurityConfigurerAdapter, like with any other Spring Boot application that we want to secure with Spring Security.
Then we need to override the .configure() method where we define the security configuration for our application:
@Configuration
public class SecurityConfiguration extends WebSecurityConfigurerAdapter {

    @Override
    protected void configure(HttpSecurity http) throws Exception {
        http.csrf().disable()
            .authorizeRequests()
            .requestMatchers(EndpointRequest.to(HealthEndpoint.class)).permitAll()
            .requestMatchers(EndpointRequest.toAnyEndpoint()).authenticated()
            .and()
            .httpBasic();
    }
}
The above code is self-explanatory, where we allowed any HealthEndpoint to be publicly available, while others require some basic authentication. Also, note that EndpointRequest.to() is a convenience method that automatically takes care of the final URL of your actuator endpoints because you might have changed the base-path of it in your application.
Let's restart again and check the logs:

Because Spring Security is in the classpath, it automatically creates a username of user and a password that is randomly generated at the start of the application, as shown in the logs.
Let's check the /health endpoint and you will see the output without any authentication box. Now let's try any other endpoint, say /env and you will be asked to authenticate:

Enter the username and password and you can see the appropriate response:

If you want to define your own username and password, you can easily do so via the application.properties:
spring.security.user.name=user
spring.security.user.password=password
Creating Custom Endpoints
This can be achieved by adding the @Endpoint and @Component annotation to your class. After that, you can create methods and annotate them with @ReadOperation, @WriteOperation, or @DeleteOperation accordingly. You can, of course, have multiple methods with different operations.
The idea of having multiple operations is to map to different HTTP request methods:
@ReadOperationmaps to HTTP GET@WriteOperationmaps to HTTP POST@DeleteOperationmaps to HTTP DELETE
Let's create a simple custom endpoint:
@Component
@Endpoint(id = "details")
public class DetailsEndpoint {

    @ReadOperation
    public String details() {
        return "My App Details";
    }
}
Restart the application and navigate to your browser to http://localhost:8080/actuator/details:

Conclusion
Monitoring applications may include something as simple as knowing the Health and Info to some complex data like understanding Traffic and Metrics for our application. For example, how much resources (CPU, RAM, etc.) are being used by the application.
Spring Boot Actuator provides build-in production ready endpoints that can be used for monitoring and controlling your application such as /info, /health, /scheduledTasks, etc.
We can also define our own endpoints to meet certain requirements by simple annotating classes with the @Endpoint annotation.
As always, the code for the examples used in this article can be found on GitHub.

