Introduction to TensorFlow
TensorFlow is a deep learning framework that provides an easy interface to a variety of functionalities, required to perform state of the art deep learning tasks such as image recognition, text classification and so on. It is a machine learning framework developed by Google and is used for designing, building, and training of deep learning models such as the Neural Networks. The Google Cloud Vision and AlphaGo are some of the examples of the applications built on top of TensorFlow. TensorFlow is an open source library and can be downloaded and used for free.
In this article, we will see how to install TensorFlow on a Windows machine.
TensorFlow Installation Types
When installing TensorFlow, you can choose either the CPU-only or GPU-supported version. I'd recommend installing the CPU version if you need to design and train simple machine learning models, or if you're just starting out. However, the CPU version can be slower while performing complex tasks, especially those involving image processing. If you need to use TensorFlow to process a huge amount of data, especially cases in which the data involves images, I'd recommend installing the GPU-supported version.
GPU supported TensorFlow requires you to install a number of libraries and drivers. It supports the NVIDIA GPU card, with support for CUDA Compute 3.5 or higher.
You must install the following software in order to run the GPU version of TensorFlow:
- NVIDIA GPU drivers
- CUDA Toolkit: CUDA 9.0.
- NCCL 2.2 (optional)
- cuDNN SDK (7.2 or higher)
- TensorRT for improved latency and throughput.
Choosing the Installation Method
On Windows, TensorFlow can be installed via either "pip" or "anaconda". Python comes with the pip package manager, so if you have already installed Python, then you should have pip as well. The package can install TensorFlow together with its dependencies.
Anaconda is also a great option for installing TensorFlow, but it is not shipped with Python like pip is, therefore you must download and install it separately.
Both packages are open source, so feel free to choose the one you like.
Installation with pip
To get the pip package manager, you first need to install Python. Download the latest version of Python from the official Python website and install it.
Once the installation completes, check for the version of pip running on your system. To do so, go to the command prompt and type:
$ pip3 --version
Since you have installed the latest version of Python, that is, Python 3.x, you have pip3, and not pip. The latter was used with Python 2.7.
It is now finally time to install TensorFlow. Run the windows command prompt as an administrator. To do so, go to the start menu on your Windows machine, search for cmd, right click it and choose "Run as administrator".
After that, you only have to run one simple command to install TensorFlow. Here is the command:
$ pip3 install --upgrade tensorflow
The command will take some time to execute, so remain patient. With pip, you can install TensorFlow with GPU support as follows:
$ pip3 install tensorflow-gpu
And that's it! You can now skip to the section "Verifying the Installation" below to make sure it is installed correctly.
Installation with Anaconda
Python is not shipped with Anaconda, so you must first install it on your system. You can download it from Anaconda.com.
Once the package is downloaded, double-click it to start the installation. Installation instructions for Anaconda can be found at this link. The installer will be verified and a welcome window will pop up.
Click "Next". In the next window, you will be required to accept the terms of the Anaconda agreement.

Click "I Agree". You will be prompted to choose the installation type, whether just for you or for all users. Choose the option you need and click "Next".
You can install it in the default directory or browse to another directory. Click "Next".
You will see the window for "Advanced Options". Check the second checkbox, that is, "Register Anaconda as my default Python 3.6".
Check out our hands-on, practical guide to learning Git, with best-practices, industry-accepted standards, and included cheat sheet. Stop Googling Git commands and actually learn it!

Click "Install" and the installation process will begin.
Once the installation completes, you will get the following message:
Click "Next" and "Finish" in the subsequent windows to complete the installation of Anaconda.
Now that you have installed Anaconda, you can use conda, a package manager used for the management of virtual environments and installation of packages for Anaconda.
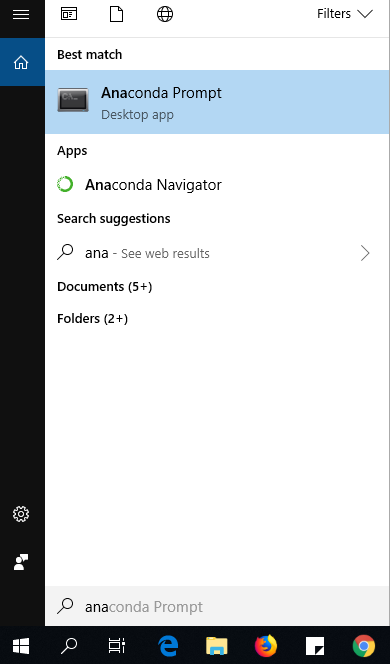
Go to the Windows start menu, and type “anaconda prompt”. From the options click "Anaconda Prompt" to launch the prompt as shown in the figure below:
To see details of the conda package, type this command in the prompt:
$ conda info
We will now create a Python virtual environment with conda. A virtual environment is an isolated working copy of Python, capable of maintaining its own files, paths, and directories so that you can work with specific versions of the different Python libraries without affecting the other Python projects.
To create a virtual environment for the TensorFlow, execute the conda create command with the following syntax:
$ conda create -n [environment-name]
Let us name the environment as tensorenviron. Although you can use any name you want.
$ conda create -n tensorenviron
You will be prompted to allow the process to proceed. Just type "y" for "yes" and press the enter key on your keyboard. The environment will be created successfully.
We can then activate the environment we have just created:
$ activate tensorenviron
You will see the prompt change.
Next, run the following command to install TensorFlow:
$ conda install tensorflow
A list of packages to be installed alongside TensorFlow will be shown. The command will prompt you to confirm the installation of these packages. Type "y" and then press the enter key. The progress of the installation process will be shown on the command prompt.
Verifying the Installation
Now that TensorFlow has been installed, we can verify whether the installation was successful or not. To do so, we can run Python's import statement and see if we can successfully import the TensorFlow library.
In the previously opened command prompt, which should be using the virtual environment in which you installed TensorFlow, type python to get to the Python terminal:
$ python
Now try to import the library:
import tensorflow as tf
If everything is okay, the command will return nothing other than the Python prompt. However, if the installation was unsuccessful, you will get an error.
Resources
Just starting out with TensorFlow? Getting it installed is just the first step. If you want to learn more beyond this then we recommend trying a more detailed resource, like the Hands-On Machine Learning with Scikit-Learn and TensorFlow book. You'll learn a lot from this book, and not only about TensorFlow and Scikit-Learn, but Machine Learning in general.
Conclusion
TensorFlow is a machine learning framework used for the development of deep learning models. The framework was developed by Google, and comes in two flavors, the CPU-only, and the GPU-supported versions. The latter is more powerful than the former and is more suitable for image processing tasks. In this article, we saw how we can install TensorFlow on a Windows machine using the pip command as well as through the Anaconda framework.

